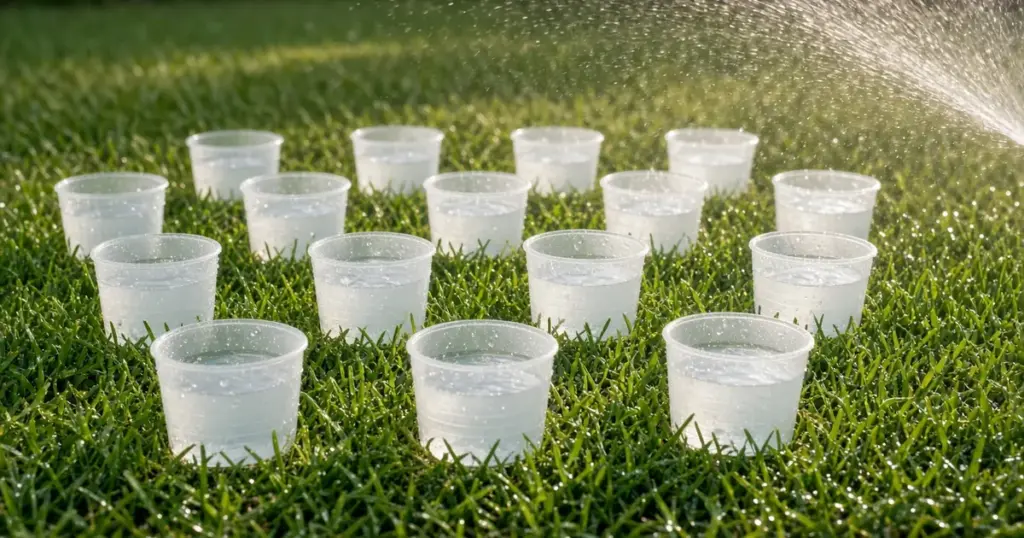
Most sprinkler schedules are set by guesswork. Someone picked ten minutes for the spray zones and twenty for the rotors years ago, and the numbers stayed. The problem is that two zones with the same run time can apply very different amounts of water. Spray heads, rotors, and rotary nozzles all apply water at different rates, and pressure, spacing, and wear change the picture further.
A catch-cup test replaces the guesswork with a measurement. You set out containers, run a zone, and measure how much water lands in each one. It takes about an hour for a typical yard and is one of the most useful things you can do to lower your water bill and fix dry spots. This guide explains how to do it at a home in Huntsville, TX or anywhere in Walker County.
What You Need
- Identical straight-sided containers, such as tuna cans, plastic cups, or purchased catch cups. You need six to ten per zone.
- A ruler that measures in small fractions of an inch.
- A notepad or phone for recording results.
- A watch or timer.
Straight sides matter. Tapered cups make depth readings misleading.
How to Run the Test
Step 1: Pick a calm morning
Wind distorts spray patterns. Early morning is usually calmest.
Step 2: Place the cups
Spread cups across the zone in a rough grid. Include spots near heads, between heads, and in areas that seem dry or soggy. Keep cups clear of the direct stream of any single head where possible.
Step 3: Run the zone
Run the zone for a set time, such as 10 or 15 minutes for spray zones and longer for rotor zones, which apply water more slowly.
Step 4: Measure
Measure the water depth in each cup and record it with the cup’s location.
Step 5: Repeat for each zone
Test every lawn zone. Bed zones on drip do not need this test.
Making Sense of the Results
Average application rate
Add the depths and divide by the number of cups to get the average depth for the test run. Divide by the run time and multiply by 60 to get inches per hour.
For example, if the average depth after 15 minutes is a quarter of an inch, the zone applies roughly an inch per hour. These are illustrative numbers, not a typical result; your zones will be different.
Uniformity
Compare the lowest readings with the average. If some cups have much less water than others, coverage is uneven. The driest areas will set how long the zone has to run to keep the whole zone healthy, and other parts of the zone get more than they need.
Using the Results
- Set run times by depth, not habit. Decide how much water you want to apply per watering and calculate the run time from each zone’s rate.
- Split into cycles on clay or slopes. If the rate is higher than your soil can absorb, use cycle-and-soak.
- Fix uneven coverage first. Increasing run time to cover a dry spot wastes water elsewhere.
- Compare zones. Spray zones may apply water several times faster than rotor zones. Our existing post on spray heads vs. rotors vs. rotary nozzles explains why.
Turning a Rate Into a Run Time
Once you know a zone’s rate in inches per hour, the arithmetic is simple. Decide how much water you want to apply in a watering, which should come from checking how deep moisture needs to go in your soil and how quickly your lawn dries out. Divide that depth by the zone’s rate and multiply by 60 to get minutes.
Then sanity-check the result in the yard. Run the zone for the calculated time, wait an hour, and probe the soil. If the moisture did not reach the root zone, lengthen the run time. If water ran off before the cycle finished, split it into two or three shorter cycles with a soak period between. Record the final numbers so you can return to them after seasonal adjustments.
Testing Mistakes to Avoid
- Running the test in wind, which pushes water away from some cups.
- Mixing container sizes or using tapered cups.
- Placing every cup next to a head, which overstates the average.
- Testing only one zone and applying the result to all zones.
- Forgetting to note cup locations, which makes it impossible to find the dry areas later.
Fixing Uneven Coverage
Common causes of low readings include:
- Heads tilted or sunk below grass level. Our existing post on why sprinkler head height matters explains the fix.
- Blocked or misaligned spray. See how to adjust sprinkler spray patterns.
- Mismatched nozzles on the same zone.
- Clogged nozzles or screens.
- Low pressure from leaks or undersized pipe.
- Heads too far apart for their radius.
Common causes of high readings include overlapping arcs, high-flow nozzles mixed with low-flow ones, and low spots where water collects.
How Often to Test
Testing once after any significant change is a good rule: new heads or nozzles, a repair that affected pressure, a new controller, or a change in landscape. Many homeowners also test at the start of summer, when water demand is highest.
Connecting It to Your Water Bill
The catch-cup test shows how efficiently each zone applies water. When combined with a schedule based on actual lawn needs, it often reveals zones that have been overwatering for years. The guide to lowering your water bill explains other ways to cut waste. If brown spots persist after you fix coverage, our existing article on preventing lawn brown spots covers other causes.
When to Call a Pro
If your test shows very uneven coverage, if you cannot get readings consistent enough to set a schedule, or if pressure problems are behind the results, a professional audit can help. Technicians can measure pressure, check nozzles and spacing, and recommend adjustments or upgrades. We provide irrigation checkups in Huntsville and across Walker County. See our services page and sprinkler repair page.
Frequently Asked Questions
How many cups do I need for a catch-cup test?
Six to ten per zone is a reasonable number for most residential zones. More cups give a clearer picture.
Can I use coffee mugs or bowls?
Use straight-sided containers of the same size. Tapered or curved containers make depth readings inaccurate.
Why do my rotor zones collect so little water?
Rotors apply water slowly. They need longer run times than spray zones to apply the same depth.
Get a Professional Irrigation Checkup
For a full coverage and efficiency review, call 346-586-6060 or request a visit.