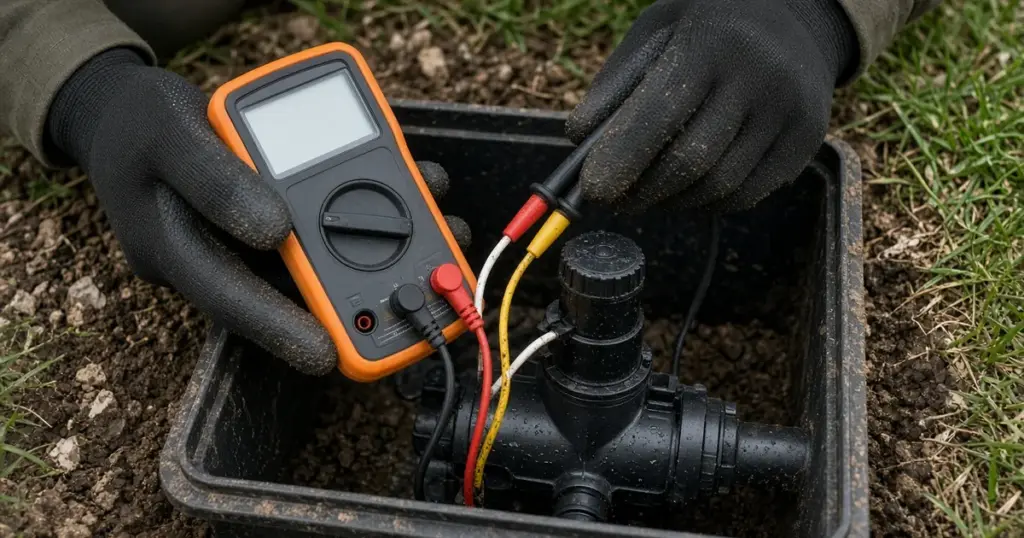
When a single zone refuses to turn on, the solenoid is one of the first suspects. It is a small, inexpensive part, it sits right on top of the valve where you can reach it, and it fails often enough that every irrigation technician carries spares. If you have a multimeter and can find the valve, you can test it yourself in a few minutes.
This guide explains what the solenoid does, how to test it, how to tell whether the problem is the solenoid or the wiring, and how to replace it. It applies to the residential valves common on systems in Huntsville, TX and throughout Walker County.
What the Solenoid Does
The solenoid is an electromagnet with a small metal plunger inside. When the controller sends current to the station, the coil energizes and lifts the plunger. That opens a small passage that lets water bleed out from above the valve’s diaphragm, and the drop in pressure allows the diaphragm to lift and the zone to run. When the current stops, a spring pushes the plunger back down, the passage closes, and the valve shuts.
If the coil is burned out, the plunger is stuck, or the solenoid has a short, the valve will not respond properly to the controller. The sprinkler valves and wiring guide explains how the whole valve works.
Signs the Solenoid May Be the Problem
- One zone will not run from the controller, but other zones work.
- The zone runs when you open the valve manually with the bleed screw or by turning the solenoid a quarter turn.
- The controller shows a fault or short on that station.
- You do not hear the faint click at the valve when the zone is activated.
- A zone will not shut off, and the plunger appears stuck.
If the zone does not run even manually, the problem is more likely the valve itself or the water supply. Our existing post on why one sprinkler zone will not turn on covers that broader checklist.
Tools You Need
- A digital multimeter that reads resistance (ohms) and AC voltage
- A small flat screwdriver
- Waterproof wire connectors rated for direct burial
- A replacement solenoid that matches your valve brand
- A rag
Test 1: Resistance Across the Solenoid
This test checks the coil itself.
- Turn off the controller or make sure the zone is not running.
- Find the valve. If you cannot, see how to find buried or lost sprinkler valves.
- Disconnect the solenoid wires from the field wires by removing the waterproof connectors.
- Set the meter to resistance (ohms).
- Touch one probe to each solenoid lead.
Reading the result:
- A reading in the normal range for that solenoid, commonly a few dozen ohms for typical residential solenoids, suggests the coil is intact. Check the manufacturer’s specification if available.
- A very high reading or no reading (open circuit) means the coil is broken. Replace it.
- A reading near zero means a short. Replace it.
Test 2: Voltage at the Valve
If the coil tests fine, check whether power is reaching it.
- Reconnect or leave the field wires accessible.
- Set the meter to AC voltage.
- Activate the zone from the controller.
- Measure across the station wire and common wire at the valve.
Most residential controllers send roughly 24 volts AC. If you read close to that, power is reaching the valve, and with a good coil, the problem is likely mechanical in the valve. If you read nothing, the issue is upstream: the station wire, the common wire, a bad splice, or the controller. Our guide to sprinkler wire repair covers fixing damaged runs.
Test 3: At the Controller
For comparison, measure voltage at the controller terminals for that station and the common while the zone is activated. Voltage at the controller but not at the valve points to a wiring problem in between.
Replacing a Solenoid
- Turn off water to the irrigation system at the isolation valve, or at least make sure the zone is off. Some solenoids can be swapped with the system pressurized, but water can spray when the solenoid is removed. Turning water off is cleaner.
- Clean around the solenoid so dirt does not fall into the valve.
- Unscrew the old solenoid counterclockwise. Keep track of the plunger and spring, which may come out with it.
- Inspect the port for debris. Wipe it clean without pushing debris inside.
- Install the new solenoid hand-tight. Make sure the new plunger and spring are seated correctly.
- Connect the wires using waterproof connectors. Solenoid leads are not polarized, so either lead can go to the station or common wire.
- Turn the water back on and run the zone from the controller.
- Confirm the zone opens and closes properly.
Why Splices Matter
A good solenoid on a corroded splice will still fail. Texas irrigation rules require splices that may be exposed to moisture to be waterproof as certified by the connector manufacturer. Ordinary wire nuts and electrical tape do not hold up in a wet valve box. Use direct-burial connectors filled with sealant, and leave a little slack so the valve can be serviced later.
When the Solenoid Is Not the Problem
If the solenoid tests good and voltage reaches the valve, but the zone still will not run, look at the valve itself: a clogged port, a stuck diaphragm, or a flow control screwed all the way down. If the zone will not shut off, a torn diaphragm or debris on the seat is likely. Our earlier post on why a zone will not shut off covers those problems.
When to Call a Pro
Call a professional if voltage is missing at the valve and you cannot find the break, if several zones fail together, if the controller keeps showing faults after a new solenoid, or if the valve body is cracked. Technicians use wire tracers and valve locators to find buried faults quickly. See our sprinkler repair page for valve and wiring repairs, and our emergency service page if a stuck valve is flooding the yard.
Frequently Asked Questions
Can a bad solenoid cause a zone to stay on?
Yes. A plunger stuck in the open position will keep the valve from closing. Debris and diaphragm problems are also common causes.
Do all solenoids fit all valves?
No. Solenoids are usually brand-specific. Match the replacement to your valve’s manufacturer.
Why does my controller show a short on one zone?
A shorted solenoid or a damaged wire touching another wire or ground are the usual causes. Test the solenoid’s resistance first.
Need Help With a Dead Zone?
If testing points to a wiring fault or a valve problem, call 346-586-6060 or request a repair. We diagnose and fix valves and wiring across Huntsville and Walker County.