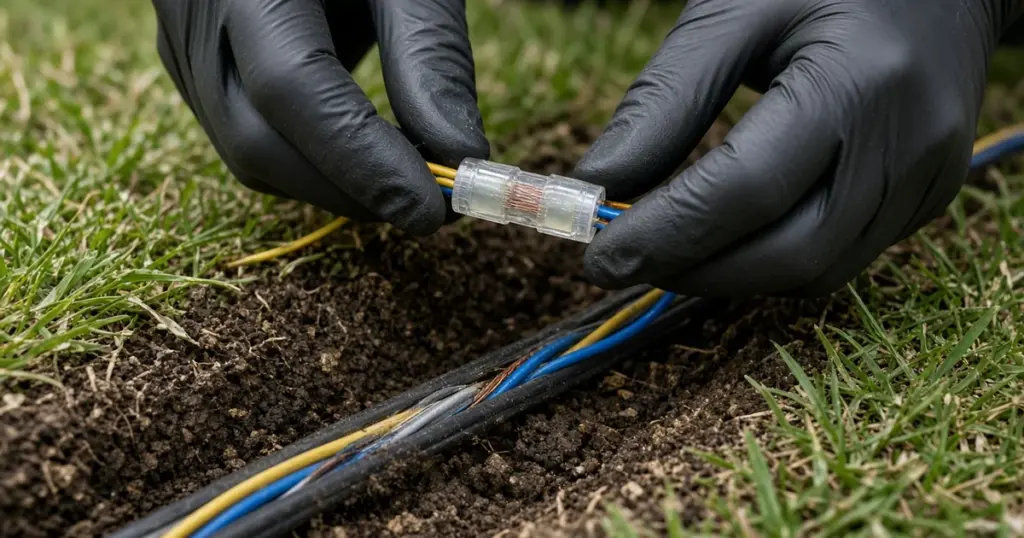
Sprinkler valves are opened by small electrical signals sent from the controller through buried low-voltage wire. When that wire is cut, nicked, or corroded, the zone stops responding even though the valve and controller are fine. Wire problems are among the most common reasons a single zone, or several zones, quit working.
Wire repair itself is not complicated. Doing it so it lasts is mostly a matter of finding the right spot and making a truly waterproof splice. Around Huntsville, TX, where clay holds moisture and heavy rains can saturate the ground, an ordinary twisted connection or electrical tape wrap will corrode quickly underground. This guide explains how wire is damaged, how to find breaks, and how to splice it properly.
How Sprinkler Wiring Is Laid Out
Most residential systems use multi-strand irrigation wire running from the controller to the valve boxes:
- One common wire connects to one lead of every valve solenoid.
- One zone wire for each valve connects to the solenoid’s other lead.
- Spare wires are sometimes included for future zones or repairs.
The controller completes a circuit through the zone wire and the common wire to open a valve. A break in a zone wire affects one zone. A break in the common wire usually affects several or all zones.
Our valves and wiring guide explains the system as a whole.
Common Causes of Wire Damage
- Digging and trenching for fences, landscaping, or utility work.
- Aeration tines puncturing shallow wire.
- Edging along beds and walks.
- Rodents chewing exposed wire in valve boxes.
- Corroded splices that were not waterproofed.
- Roots pinching or abrading wire over time.
Recent yard work near the wire path is the most common clue. If a zone stopped working right after a fence was installed, start looking along the fence line.
Diagnosing a Wire Problem
Step 1: Test at the controller
With power off, use a multimeter to measure resistance between the zone terminal and the common terminal. A reading within the solenoid’s normal range suggests the circuit is intact. An open or extremely high reading indicates a break somewhere in the wire or solenoid. A very low reading can indicate a short.
Step 2: Test at the valve
Disconnect the solenoid leads and test the solenoid directly. If the solenoid tests fine but the circuit from the controller does not, the wire is the problem. Our article on testing and replacing a sprinkler solenoid covers solenoid testing in detail.
Step 3: Try a spare wire
If the wire bundle has a spare, connecting it to the zone at both ends is a quick way to confirm a break and restore operation while a full repair is planned.
Step 4: Locate the break
For a single break, start at the most likely damage points: recent digging, edging lines, and places where wire passes near trees. Professionals can use a wire tracer that sends a signal along the wire and detects where it stops.
If the valves themselves are hard to find, see how to find buried sprinkler valves.
Making a Waterproof Splice
Texas irrigation standards call for underground wire splices to be waterproof. For homeowners, the practical point is simple: any splice that will be buried or sit in a valve box should be made with a connector designed for direct burial.
Materials
- Wire strippers
- Direct-burial waterproof connectors (gel-filled or grease-filled types)
- Irrigation wire of matching or appropriate gauge if a section needs replacing
Steps
- Turn off the controller.
- Expose the wire on both sides of the damage.
- Cut out damaged insulation or nicks.
- Strip the ends just enough for the connector.
- Twist the conductors together in a wire nut or crimp, as the connector instructs.
- Push the connection fully into the waterproof sealant and close the connector.
- Leave slack so the splice is not under tension.
- Test the zone before reburying.
Where to place splices
Where possible, put splices in a valve box rather than burying them in open soil. That makes future inspection easier. If you must bury a splice, record its location.
Burying Wire Properly
When replacing a section of wire, run it alongside the pipe where possible. TCEQ guidance for new installations calls for irrigation wire to be buried at least six inches deep. Deeper is better in areas that will be aerated. Avoid running wire where it will be cut by future edging or stakes.
If you are digging to reach wire, keep in mind that pipe often runs right next to it. Our article on repairing a broken sprinkler pipe covers what to do if you nick a line.
When a Break Cannot Be Found
Sometimes the break is impossible to locate without equipment, or the wire is buried under a driveway or patio. Options include:
- Using a spare wire in the bundle.
- Running a new wire along a new path.
- Using a wireless or decoder solution in some setups.
Common Mistakes
- Using electrical tape underground.
- Twisting wires without a connector.
- Burying splices without records.
- Assuming a solenoid is bad without testing the wire.
- Ignoring the common wire when multiple zones fail.
Our existing post on why one sprinkler zone won’t turn on covers other causes besides wiring.
When to Call a Pro
Call a professional if multiple zones fail at once, if you cannot find the break, if the controller reports a short, if wire runs under hardscape, or if you are not comfortable using a multimeter. Technicians use tracers to find breaks quickly without digging up the whole yard. We troubleshoot sprinkler wiring for homes across Huntsville and Walker County. See our sprinkler repair page and services page.
Frequently Asked Questions
Can I use regular wire nuts on sprinkler wire?
Not underground or in a valve box without a waterproof sealant. Use direct-burial connectors designed for wet locations.
How do I know if the common wire is broken?
If several zones stop working at once while others still work, or all zones fail, a common wire break is a likely cause.
Do I need to dig up the entire wire to fix a break?
No. Once the break is located, only that section needs to be exposed and spliced or replaced.
Get Your Zones Working Again
If a zone has gone silent and you suspect wiring, call 346-586-6060 or schedule a repair.