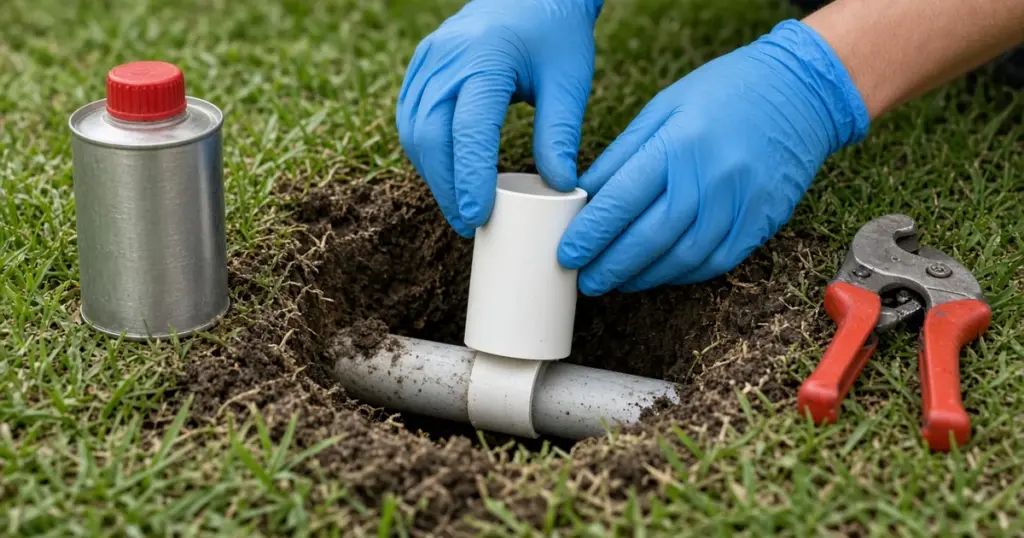
A broken sprinkler pipe is one of those repairs that looks simple from the outside. Dig a hole, cut out the bad piece, glue or clamp in a new one, fill the hole. In practice, the quality of each step decides whether the repair lasts for years or starts leaking again in a month. Dirt in the line, a fitting not rated for the pipe, an unprimed joint, or a hurried backfill are all common reasons repairs fail.
This article walks through how a pipe repair is done properly, so you can tackle a simple lateral repair yourself or know what to expect when a technician does it. It is written with the sandy-over-clay soils of Huntsville, TX and Walker County in mind.
Step 1: Confirm and Locate the Break
Before digging, confirm there is a break and narrow down where it is.
- Run the zone and look for water bubbling up, a geyser, a soggy patch, or heads with weak pressure downstream of a certain point.
- Check the water meter with everything off. If the leak indicator moves, water is escaping somewhere. Closing the irrigation shutoff tells you whether it is on the irrigation side.
- Decide whether it is a main line or lateral. A leak that runs even when no zone is on is on the main line, which is always pressurized. A leak only during a zone’s cycle is on that zone’s lateral.
In sandy soil, water can travel along the top of the clay layer and surface some distance from the break. A wet spot is a starting point, not a guarantee of location. Our existing post on signs of an underground sprinkler leak describes the clues to look for, and the sprinkler leak repair guide covers detection methods.
Step 2: Shut Off the Water
For a lateral line, make sure the zone will not run. For a main line, close the irrigation isolation valve or the supply to the backflow assembly. If you are not sure where those valves are, find out before you start; a main-line repair with water running is a muddy mess.
Step 3: Call Before You Dig
Other utilities share your yard: gas, electric, communications, and sometimes water or sewer laterals. Texas 811 handles locate requests for underground utilities, and it is the safe first step before significant digging.
Step 4: Expose the Pipe Carefully
- Cut and lift the sod in a rectangle large enough to work in, and set it aside to replace later.
- Dig beside the pipe, not directly over it, so the shovel does not hit it.
- Expose enough length on both sides of the break to work comfortably and to see the full extent of the damage. Cracks often extend farther than the visible split.
- Look for the cause. Roots, a rock, a stake, or soil settling can all break pipe. If you leave the cause in place, the repair may fail. Our article on how pine and hardwood roots damage irrigation lines explains how to handle root damage.
Sandy soil collapses easily, so keep the hole wider at the top and set soil on a tarp.
Step 5: Identify the Pipe and Choose the Fitting
The repair method depends on the pipe material. Our comparison of PVC vs. poly pipe explains how to tell them apart.
- PVC is rigid and usually white. Repairs use solvent-weld fittings or repair couplings designed to slip over the pipe so you do not have to pull the line apart.
- Poly is flexible and usually black. Repairs use barbed insert couplings secured with clamps.
Match the fitting to the pipe size and pressure rating. A fitting meant for a different pipe type or size is a leak waiting to happen.
Step 6: Cut Out the Damage
Cut squarely beyond the damaged section on both sides, using a pipe cutter for clean edges. Remove burrs. Check that the remaining pipe ends are round, crack-free, and clean.
Step 7: Keep Dirt Out
This is where many repairs go wrong. Once the pipe is open, soil can fall in and later clog heads, nozzles, and valves. Cover open ends with a rag or bag, and keep the work area as clean as possible.
Step 8: Make the Joint
For PVC
- Dry-fit the repair to make sure everything aligns.
- Clean both surfaces.
- Apply primer to the pipe and fitting. Texas rules require a colored primer on new PVC installations for fittings that rely on a chemical bond, and using it on repairs is good practice.
- Apply cement and push the pieces together fully, with a slight twist if the fitting allows.
- Hold briefly so the joint does not push apart.
- Let it cure according to the cement manufacturer’s directions before pressurizing.
For poly
- Push the barbed coupling fully into each pipe end. Warming the pipe end slightly can make it easier.
- Position clamps over the barbs and tighten them securely.
- Replace nearby corroded clamps while you are there.
Step 9: Flush the Line
Before the line goes back into regular service, flush it. For a lateral, remove the head or nozzle nearest the end of the zone and run the zone briefly to push out debris. For a main line, follow with a run of each zone and check nozzles for debris.
Step 10: Pressure-Test Before Backfilling
Turn the water back on and run the zone, or let the main line pressurize. Watch the repair closely for drips or weeping. It is much easier to fix a problem now than after the hole is filled.
Step 11: Backfill and Restore
Backfill in layers, compacting as you go so the pipe is supported and the surface does not sink later. Texas standards call for trenches and holes to be backfilled and compacted to original grade, and for pipe to be covered to the manufacturer’s specified depth or at least six inches of select backfill where none is published. Avoid putting rocks or debris directly against the pipe. Replace the sod and water it in.
Common Repair Mistakes
- Skipping the flush and clogging heads downstream.
- Using the wrong fitting or pipe size.
- Not letting PVC cement cure before pressurizing.
- Backfilling before checking for leaks.
- Leaving the root, rock, or stake that caused the break.
- Repairing one crack and missing another nearby.
When to Call a Pro
Call a professional if the leak is on the main line, if you cannot locate the break, if the damage is under a driveway, sidewalk, or patio, if roots are wrapped around the pipe, or if repairs keep failing in the same area. Main-line breaks are also a good reason to call quickly because they run continuously. See our sprinkler repair page for pipe repairs and our emergency service page if water is flowing and you cannot shut it off.
Frequently Asked Questions
How long should I wait before running water through a glued PVC repair?
Follow the cement manufacturer’s cure time, which depends on pipe size, temperature, and humidity. Pressurizing too soon can push the joint apart.
Can I use tape or a clamp to patch a cracked sprinkler pipe?
Temporary patches rarely hold under pressure. Cutting out the damaged section and installing a proper fitting is the reliable fix.
Why do my heads clog after a pipe repair?
Debris got into the line during the repair. Flush the zone by removing the end head and running water, then clean the affected nozzles.
Need a Pipe Repair?
If you have a broken line you would rather not dig up yourself, call 346-586-6060 or request service. We repair irrigation pipe throughout Huntsville and Walker County.