A new sprinkler system is a significant project. Done well, it waters evenly for years with little attention. Done poorly, it becomes a source of dry spots, soggy patches, high bills, and repeated repairs. Knowing what a good installation looks like helps you compare proposals, ask the right questions, and recognize quality work when you see it.
This guide walks through the typical installation process for a residential system in Huntsville, TX and the surrounding Walker County area, from the first site visit to the final walk-through. Every installer works a little differently, but the core steps are similar.
Step 1: Site Evaluation
A good installation starts with understanding the property:
- Water source. Public water or a well, along with available pressure and flow.
- Lawn and planting areas. Size, shape, plant types, sun and shade.
- Soil. Sandy topsoil, clay, or layers of both, which affect zone design and scheduling.
- Slopes and drainage.
- Hardscape. Driveways, walks, patios, and pools.
- Trees. Root zones to avoid and shade patterns.
- Utilities. Locations to be marked before digging.
Static pressure and flow measurements tell the designer how much water each zone can use.
Step 2: Design
The design determines how well the system will water. Key decisions:
Zoning
TCEQ design standards for new systems call for zones to be separated by plant type, microclimate, topography, and soil conditions. In practice, that means lawn and beds on separate zones, sun and shade separated where possible, and slopes zoned apart from flat areas.
Head selection and spacing
Heads are chosen for each area: sprays for small areas, rotors for larger areas, rotary nozzles where slower application helps, and drip for beds. Heads within a zone should have matched precipitation rates, and spacing must stay within the manufacturer’s published radius. Our existing article comparing spray heads, rotors, and rotary nozzles explains the options.
Hardscape setbacks
Texas standards require heads to be at least 4 inches from hardscape and directed away from it, and prohibit above-ground spray in landscapes under 48 inches wide bordered by pavement on two or more sides.
Controller and sensors
New automatic systems in most of Texas must include a rain or moisture shut-off device. Many homeowners choose a smart controller. Some add a flow sensor and master valve for leak protection; see flow sensors and master valves.
Backflow prevention
The design specifies the backflow assembly type for the property’s hazard level and water provider requirements, with an isolation valve between the meter and the assembly.
Step 3: Proposal and Permits
You receive a proposal describing the design, equipment, and price. We do not publish standard prices because every property is different; our article on irrigation installation cost factors explains what drives the cost. Permits, if required by the local city or water provider, are arranged before work begins. Inside Huntsville city limits, irrigation taps have appeared on city permit records.
Step 4: Installation Day
- Utilities are marked through Texas 811.
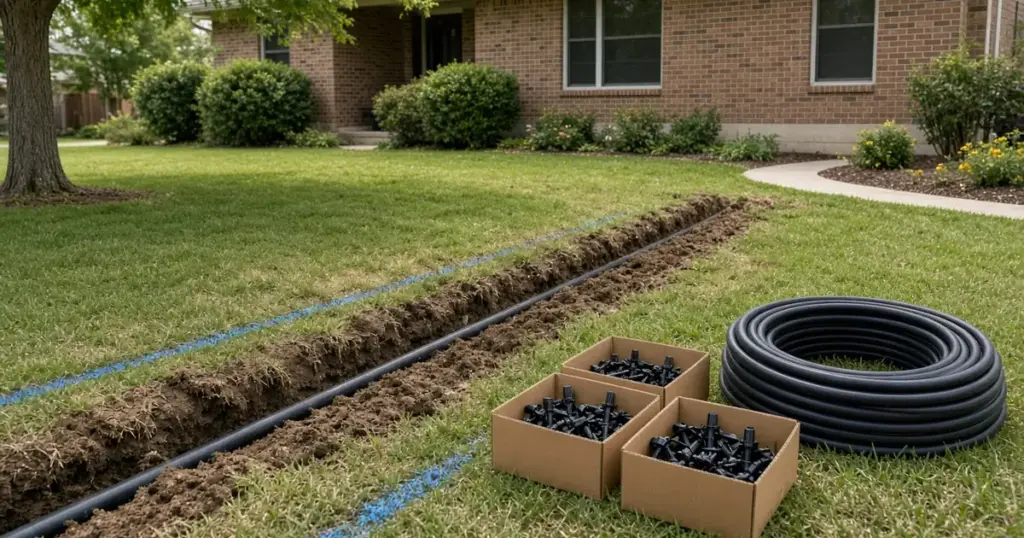
- The layout is marked with flags and paint.
- Trenches are dug or pipe is pulled with equipment that minimizes turf damage.
- The backflow assembly and main line are installed.
- Valves are installed in valve boxes, as Texas standards require.
- Lateral pipe and heads are installed. Solvent-weld PVC joints use colored primer, per Texas standards.
- Wire is run and spliced with waterproof connectors, buried at least six inches.
- Lines are flushed before nozzles are installed.
- The controller and sensors are installed and wired.
- Trenches are backfilled and compacted to grade.
Step 5: Testing and Adjustment
- Each zone is run and heads are adjusted for arc and radius.
- Coverage is checked for gaps and overspray.
- The backflow assembly is tested by a licensed tester, as TCEQ rules require for new installations, with results provided to the water provider.
Step 6: Handoff
A good installer leaves you with:
- A programmed controller set for the season, with cycle-and-soak where needed.
- A zone map showing what each zone waters.
- Valve and backflow locations.
- Instructions for adjusting the schedule and shutting off the system.
Ask your installer for the system’s paperwork, including a maintenance checklist, the equipment list, warranty information, and the backflow test report. Keep them together in one place; they will be useful for future repairs and if you ever sell the home.
After Installation
New turf may need a different schedule for a few weeks. Settling can make heads sink or tilt, so a follow-up check after the first few weeks is useful. Seasonal adjustments keep the system efficient year-round.
Questions to Ask Before Signing
- How will the zones be divided, and why?
- What head and nozzle types will each zone use?
- What controller and rain or moisture sensor are included?
- What backflow assembly will be installed, and who handles the test?
- How will trenches be restored?
- What does the warranty cover, and for how long?
- Will I receive a zone map and maintenance checklist?
Clear answers to these questions are a good sign that the installer has thought through the design rather than applying a standard layout to every yard.
Choosing an Installer
In Texas, irrigation installation for others must be done by or under the supervision of a licensed irrigator. Our article on hiring a licensed irrigator in Texas explains how to check a license and what to ask. If you are considering adding zones to an existing system instead of a full installation, see adding a sprinkler zone. The installation and upgrade guide covers the full range of options.
When to Call a Pro
New system installation is a job for a licensed irrigator. Call when you are planning a new system, renovating your landscape, or replacing a system that no longer works well. We design and install irrigation systems for homes across Huntsville and Walker County. See our irrigation installation page and our services page.
Frequently Asked Questions
How long does a sprinkler installation take?
It depends on the property size and complexity. Many residential installations take a few days, including testing.
Will installation damage my lawn?
Trenching disturbs turf along pipe routes, but good installers minimize damage and restore the soil. Turf typically recovers with care.
Do I need a rain sensor on a new system?
In most of Texas, TCEQ rules require a rain or moisture shut-off device on new automatic irrigation systems.
Plan Your New System
To start planning a new sprinkler system, call 346-586-6060 or request an estimate.